If you decide to build a brand-new website, the next step is to select the platform you’d like to use. Hostinger gives you two main options: WordPress, the world’s most popular content management system for blogs, business sites, and online stores, or the Hostinger Website Builder, a beginner-friendly drag-and-drop tool that lets you design pages quickly without any coding. Take a moment to consider which one best fits your needs before moving forward.
Website Development with WordPress — Step-by-Step Guide
Almost everyone dreams of creating their own website. There’s an unmatched excitement in seeing your website live on the World Wide Web. In the early days, building a website was a challenging task that required deep technical knowledge. Most people struggled to understand the complexities involved. But today, things have changed dramatically—thanks to the availability of powerful tools like WordPress, plugins, and platforms, developing a website has become much simpler and more accessible for everyone.

WordPress is the perfect choice if you want a professional website without getting bogged down in technical details. In this article you’ll find a clear, step-by-step roadmap — from planning and design to setup, optimization, and launch — plus plugin recommendations and solutions for common problems. It’s aimed at beginners, so we’ll walk through each stage at an easy pace; follow along and you’ll gain the skills and confidence to manage your site like a pro. Ready? Let’s build something great together.
Step No. 1. Plan before you build (the secret that saves time)
Before touching hosting or themes, spend 1–2 hours planning. Good planning reduces rework.
Purpose: Blog, portfolio, business site, e-commerce (WooCommerce), membership, or landing page?
Audience: Who visits? What problems are you solving for them?
Core pages: Home, About, Services/Products, Blog, Contact, Privacy/Terms.
Content plan: 10–15 initial pages/posts and topic clusters for SEO.
Design moodboard: Colors, fonts, example sites you like.
Monetization & features: Ads, memberships, store, booking, affiliate links.
Step No. 2. Choose Hosting Plan and domain name
What is hosting ?
In website development, hosting is basically the service that allows your website to be accessible on the internet. Think of it like renting space on a computer (server) that’s always connected to the internet, where all your website files are stored.
What Hosting Does ?
Stores all your website files: HTML, CSS, images, videos, databases, etc.
Keeps your website online 24/7, so anyone can visit it anytime.
Provides a server with resources (storage, RAM, bandwidth) needed to run your site smoothly.
How It Works ?
You build a website on your computer.
You upload it to a hosting server.
When someone types your domain name (like
factechno.com), the internet connects them to your hosting server.Your website loads for the visitor.
Types of Hosting
| Type | Best For |
|---|---|
| Shared Hosting | Small websites, blogs, beginners (cheaper) |
| VPS Hosting | Medium websites, more control & resources |
| Dedicated Hosting | Big websites, heavy traffic |
| Cloud Hosting | Scalable websites, flexible and fast |
| WordPress Hosting | Websites built on WordPress |
You can choose any hosting types whichever you need and like the most.
Select Hosting Plans
Select Hosting Period
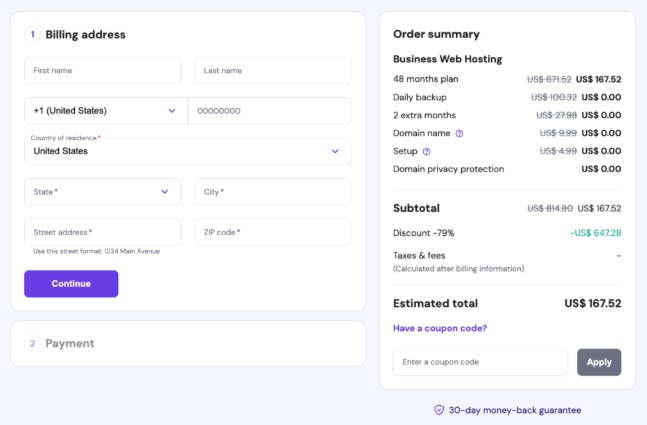
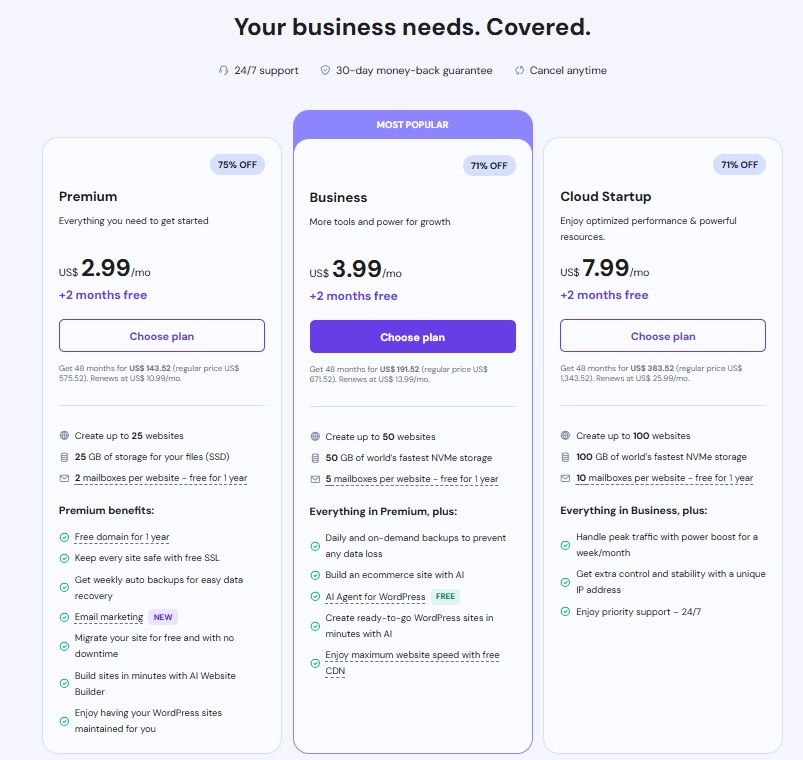
You can choose to buy hosting for 1 month, 12 months, 24 months or 48 months. It’s all upto you if you choose for longer period of time then you can save some money.
Create Hosting Account
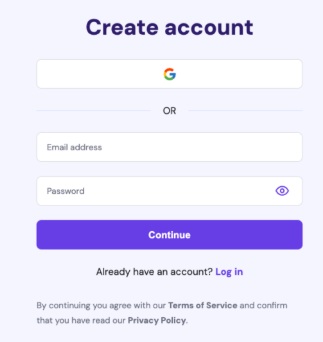
Billing Corner
What Next ❔🙄
Once your purchase is complete, Hostinger will guide you to the onboarding page, where you can choose to either create a brand-new website or migrate an existing one.
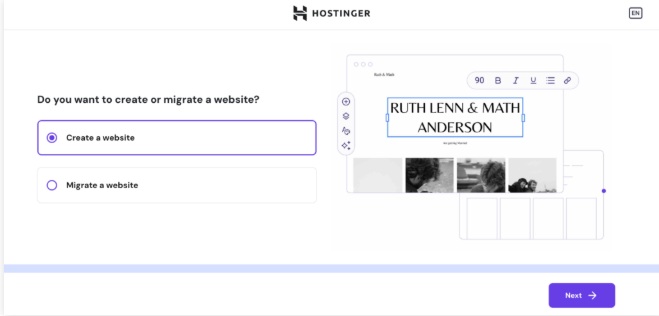
Create or Migrate Website
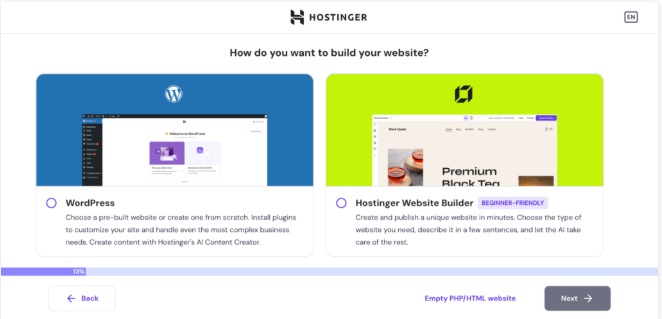
Now you would require a domain name for the website you want to developed. Short and engaging domain should be preffered.
Luckly! if you are buying domain name for the first time from hostinger.com then you will get domain name absolutely free of cost for 12 months.
Let’s go through step by step process of getting domain name
Step-by-Step Guide to Buying a Domain Name on Hostinger.com
1. Choose Your Domain Name and Extension (TLD)
Start with a name that’s short, catchy, and easy to remember. Avoid tricky spellings, unnecessary hyphens, or underscores. Before you settle on a name, do a quick trademark check to make sure it’s legally safe to use.
2. Search for Your Domain
Head to Hostinger → Domain Name Search (or visit hostinger.com/domain-name-search).
Type your desired name in the search bar and click Search. Hostinger will instantly show you all available extensions (like .com, .net, .online, .tech, etc.) along with their prices.
3. Select and Add to Cart
If your ideal .com is already taken, look at other options such as .net or creative TLDs like .tech. Once you find the one you like, click Add to Cart or Make it Yours.
On the cart page, you can also choose how long you’d like to register it (one year or more) and see any recommended add-ons.
4. Choose Extras (Optional)
Privacy Protection (WHOIS Guard): Hostinger offers Domain Privacy Protection to hide your personal contact details in public WHOIS records—highly recommended.
Email or Hosting: Planning to build a website right away? You can add hosting and even claim a free domain for the first year if you purchase an eligible annual hosting plan (Premium, Business, or certain Cloud plans).
5. Checkout and Create a Hostinger Account
Proceed to checkout. If you’re new, you’ll need to create a Hostinger account; existing users can simply log in. Fill in your billing details and pay using any of the supported payment methods.
6. Complete the Domain Registration Form
After payment, Hostinger will ask for registrant details such as your name, email, address, and phone number. Provide accurate information—ICANN requires this for all domain registrations.
You may also see a quick Setup button in Hostinger’s dashboard (hPanel) to finalize the process.
7. Verify Your Email Quickly
Within a few minutes, Hostinger will send a verification email (from an address like @hostinger-domains.com). Click the link inside within 15 days to keep your domain active. If you don’t see it, you can resend the verification email from hPanel → Domains → Manage → Resend Email.
8. Wait for Activation and DNS Propagation
Your domain is usually active within a few hours. DNS changes, however, may take up to 24 hours to propagate worldwide—this is normal.
9. Manage Your Domain in hPanel
Once active, go to hPanel → Domains to control everything:
Turn on/off auto-renewal
Enable or disable privacy protection
Change nameservers or add DNS records (A, CNAME, TXT)
Transfer the domain to another registrar if needed
10. (Optional) Transfer an Existing Domain to Hostinger
Already own a domain elsewhere? Hostinger lets you transfer it in. You’ll need the EPP/Auth code from your current registrar and to follow the on-screen transfer instructions.
Most hosts offer a 1-click WordPress install in their dashboard. If you do it manually:
Download WordPress (wordpress.org).
Create a database (via cPanel → MySQL).
Upload WordPress files via FTP to your domain folder.
Run the installation script (
yourdomain.com/wp-admin/install.php) and follow prompts.
Once installed, log into yourdomain.com/wp-admin.
First thing — Basic WordPress setup
Permalinks: Settings → Permalinks → choose Post name for SEO-friendly URLs.
Site Title & Tagline: Settings → General.
Timezone & Date Format: Settings → General.
Reading: Settings → Reading → set homepage to a static page or latest posts depending on site type.
Discussion: adjust comment moderation to control spam.
Users: Create an admin user with a strong password; avoid using “admin” as username.
Install and activate a few essential plugins (details later).
Choose a theme & child theme 🎢
Theme options
Lightweight/fast themes: GeneratePress, Astra, Neve — great for speed and compatibility.
Feature-rich: OceanWP, Kadence.
Block themes: For full site editing (FSE) if you prefer Gutenberg for design.
Use a child theme if:
You plan to do custom PHP/CSS. Child theme preserves changes through theme updates.
Tip: Start clean. A fast, minimal theme + page builder often beats a heavy all-in-one theme.
Pick a page builder or use Gutenberg 👷♂️👷♀️
Gutenberg (block editor): Continues improving — suitable for many websites without extra plugins.
Elementor (free + pro): Popular, intuitive drag-and-drop builder.
Beaver Builder, Brizy: Solid alternatives.
Use a builder you’re comfortable with — but avoid loading multiple heavy builders together.
Must-install plugins (functionality & recommendations) 🔌
Elementor (if using), Social Share plugin (Sassy Social), Schema Pro (for rich snippets), Cookie consent (Complianz).
SEO ( Search Engine Optimization )
Rank Math or Yoast SEO — meta titles, XML sitemaps, schema basics.
Security
Wordfence or Sucuri — firewall and scanning.
Limit Login Attempts or Loginizer — block brute force.
Backup
UpdraftPlus — scheduled backups to Google Drive/Dropbox/S3.
Caching & Performance
WP Rocket (premium), or W3 Total Cache / WP Super Cache (free).
Autoptimize — minify CSS/JS.
Image Optimization
ShortPixel, Smush, or Imagify — compress & convert to WebP.
Forms
WPForms (lite), Gravity Forms, or Contact Form 7.
Analytics
MonsterInsights (Google Analytics integration) or manually add GA4 script.
Ecommerce
WooCommerce (if selling products).
Other
Keep plugins minimal — each plugin adds potential bloat and conflict.
Design your site (layout & UX)
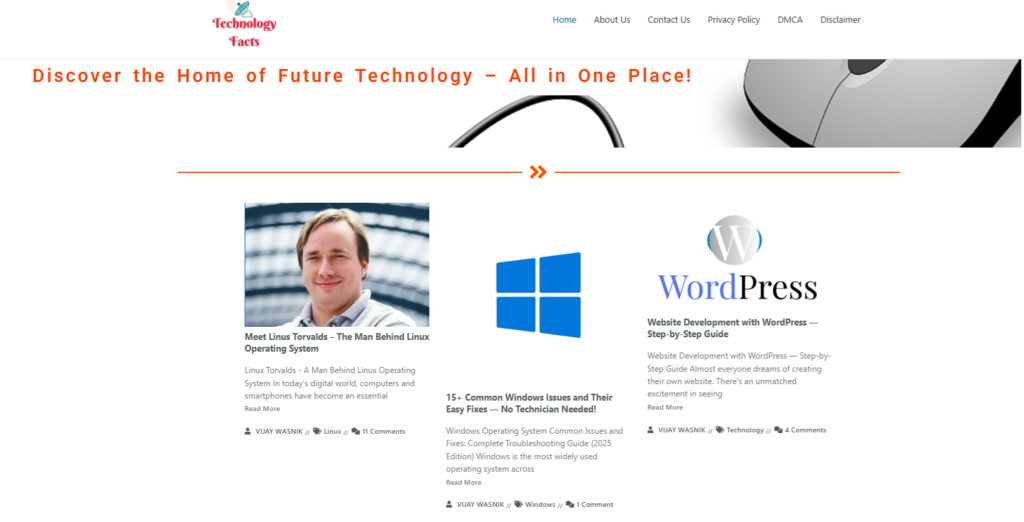
Home page
Clear headline: who you help & value proposition.
CTA (call to action): subscribe, buy, contact.
Visual hierarchy: hero section, features/benefits, testimonials, blog/latest posts.
Key pages
About: Story and credibility.
Blog: Categorize content (pillars and clusters).
Services/Product pages: Features, benefits, pricing, CTA, FAQs.
Contact: Form, map, email, phone.
Legal: Privacy Policy, Terms, Disclaimer (important for GDPR).
Mobile first
Design mobile responsiveness early. Most traffic is mobile — test on phones.
Accessibility
Alt text for images, semantic headings (H1, H2…), color contrast, keyboard navigation.
Create content (SEO & user value) 👥
Keyword research
Use tools: Google Keyword Planner, Ubersuggest, Ahrefs/SEMrush (paid).
Focus on long-tail keywords (easier to rank; higher intent).
Content structure
Long-form pillar posts (1,500–3,000 words) + shorter supporting posts.
Use headings, bullet lists, images, and internal links.
Meta title + meta description for every page/post.
On-page SEO checklist
URL includes keyword.
H1 contains main keyword.
Meta description — compelling (120–160 chars).
Use ALT tags for images (describe, include keyword naturally).
Internal linking to pillar pages.
Schema markup for articles, products, FAQs.
E-commerce setup (WooCommerce) — if applicable 🧑💼👨💼
- Install WooCommerce.
Configure store address, currency, payment gateways (Stripe, PayPal).
Set up shipping zones, tax rules.
Create product categories, product pages with clear images, descriptions, variants.
Optimize checkout flow — fewer fields = higher conversion.
Add trust signals: SSL, clear return policy, contact info.
Security hardening (non-negotiable) 🔐🪪
Use SSL (HTTPS) — many hosts provide free Let’s Encrypt certificates.
Change default database prefix (
wp_) during install or via plugins.Disable file editing: add
define('DISALLOW_FILE_EDIT', true);towp-config.php.Set strong passwords and enable 2-Factor Authentication.
Limit login attempts and enable reCAPTCHA on forms.
Keep WordPress core, themes, and plugins updated.
Schedule regular security scans.
Performance optimization (speed is SEO & UX) 🚄
- Caching: Page caching + object caching.
CDN: Cloudflare or other CDN to serve static assets faster.
Image optimization: Compress & serve WebP.
Minify & defer CSS/JS (Autoptimize/WP Rocket).
Critical CSS & lazy loading: Improve first contentful paint.
Limit plugins & external scripts.
Use a fast host — hosting choice is the #1 speed factor.
Testing (before launch) 🧪
Mobile responsiveness: Chrome DevTools + real devices.
Performance tests: Google PageSpeed Insights, GTmetrix.
Broken links: Use Broken Link Checker or Screaming Frog.
Forms: Send test messages, ensure emails land in inbox (configure SMTP if needed).
Cross-browser: Chrome, Firefox, Safari, Edge.
Accessibility check: WAVE or Lighthouse.
Launch checklist ✅
- Remove “Coming Soon” page.
Configure Google Analytics (GA4) and Google Tag Manager if used.
Submit sitemap to Google Search Console & Bing Webmaster Tools.
Check robots.txt (allow crawling).
Set up redirects (if moving from old URLs).
Create social sharing images (Open Graph & Twitter Card metadata).
Announce launch via social media & email list.
Post-launch maintenance & growth ⛑️💹
Maintenance schedule
Daily/weekly: Monitor uptime and security alerts.
Weekly: Update plugins/themes; quick backup before updates.
Monthly: Review backups, clean database, check analytics.
Quarterly: Audit content & SEO, refresh outdated posts, check broken links.
Growth strategies
Content marketing: pillar content + cluster pages.
Email marketing: lead magnet + weekly newsletters.
Social & video: repurpose posts into reels/shorts.
Guest posting & partnerships for backlinks.
Paid ads (Google Ads, Facebook) for targeted traffic.
Troubleshooting common problems 😵💫🌠
- White Screen of Death (WSOD): Disable plugins via FTP (rename
pluginsfolder). Switch to default theme (twentytwenty…) if needed. 500 Internal Server Error: Check
.htaccess, increase PHP memory limit, check error logs.Database Connection Error: Confirm DB credentials in
wp-config.php, check host, repair DB viawp-admin/maint/repair.php.Slow admin area: Disable heavy plugins, increase memory, use object cache.
Emails not sending: Use SMTP plugin (WP Mail SMTP) and configure with a transactional email provider (SendGrid, Mailgun).
- White Screen of Death (WSOD): Disable plugins via FTP (rename
Monetization options (how to make money from your WP site) 💰
Ads: Google AdSense, Ezoic — use responsibly (don’t ruin UX).
Affiliate marketing: Product reviews and comparison posts.
Sponsored posts & partnerships.
Sell products or digital downloads (WooCommerce or Easy Digital Downloads).
Memberships & subscriptions (MemberPress, Restrict Content Pro).
Freelance or agency services — showcase your portfolio and accept clients.
Advanced tips (scaling & professionalism) 📈
Staging site: Always test on staging before pushing to live.
Version control: Use Git for theme/plugin development.
Automation: Use Zapier or Make for automating tasks (e.g., new post → social).
Server monitoring & logging: Use tools for uptime and error monitoring.
SEO & content promotion checklist (first 90 days) ☑️
-
-
-
-
-
Publish 3–5 pillar articles and 7–10 supporting posts.
-
Build internal linking structure.
-
Share content on social platforms and relevant forums/communities.
-
Reach out for guest post opportunities.
-
Track keywords and rankings — adjust content based on performance.
-
-
-
-
Final checklist (quick recap before you hit publish) 📢
Domain & hosting ready
SSL installed
WordPress core updated
Theme & child theme set up
Essential plugins installed (SEO, security, backup, analytics)
Core pages live (Home, About, Contact, Privacy)
Mobile & cross-browser tested
Speed & accessibility checked
Sitemap submitted to Google Search Console
Backup scheduled
FAQs (short) ❓
Q: How long does it take to build a professional WordPress site?
A: A simple blog/site: 1–3 days. Business site with custom design: 1–3 weeks. E-commerce: 2–6 weeks depending on product count & customization.Q: How much will it cost?
A: Domain ($10–20/yr), hosting ($3–30+/mo for shared; $30–200+/mo for managed). Premium themes/plugins add one-time or yearly fees. Expect $50–$500+/year for a quality site; custom agency builds cost much more.Q: Do I need coding skills?
A: Not necessarily. Page builders cover most needs. Coding helps for custom features and optimization.
Conclusion — build smart, not hard 👍
WordPress gives you a powerful platform to create almost any kind of website. The key is to plan, keep the site lean (few high-quality plugins), focus on content & user experience, and keep security and performance at the forefront. Follow the steps above and you’ll have a rock-solid, professional WordPress site that grows with your goals. 😊❤️
Over to You! ❤️
“I really appreciate you taking the time to read this blog. Your thoughts and feedback mean a lot to me, so I’d love to know your opinion in the comments!”![]() Drop your thoughts in the comments.
Drop your thoughts in the comments.![]() Share this post with your tech-loving friends.
Share this post with your tech-loving friends.![]() Follow us for more future tech insights.
Follow us for more future tech insights.

I must say this article is extremely well written, insightful, and packed with valuable knowledge that shows the author’s deep expertise on the subject, and I truly appreciate the time and effort that has gone into creating such high-quality content because it is not only helpful but also inspiring for readers like me who are always looking for trustworthy resources online. Keep up the good work and write more. i am a follower.
Thank you so much for your kind words! I truly appreciate your thoughtful feedback and support. It means a lot to know that my content is helpful and inspiring to readers like you. I’ll definitely keep sharing more valuable posts — your encouragement keeps me motivated!
Your blog is a testament to your dedication to your craft. Your commitment to excellence is evident in every aspect of your writing. Thank you for being such a positive influence in the online community.
Yo, just wanted to drop a line about 3888win. Been playing around on there and it's pretty solid. Good selection and smooth gameplay. Give it a shot at 3888win.
i enjoy reading this great article, i have shared it many times on my website and started following you, Do you post more often ?? i am the owner of https://toplinkbuildingagenturen.de/ a webdesign agency in Germany, webdesign agentur bayreuth, you can link up if you are interested. Thank you